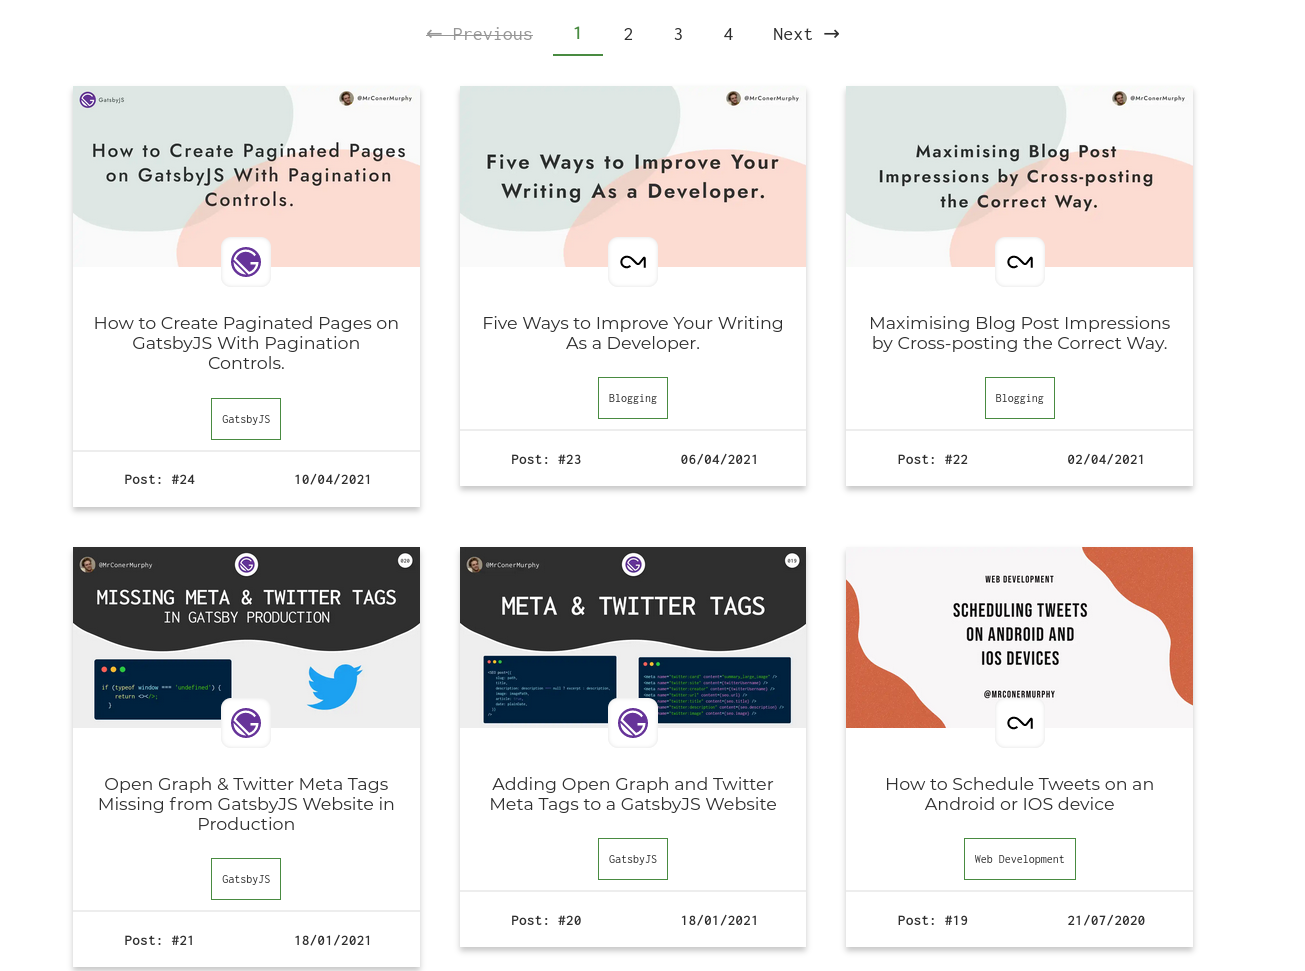
How to Create Paginated Pages on GatsbyJS With Pagination Controls.

Fullstack Developer | Technical Writer | Freelancer 👩💻
Posts about Web Dev, Tech, and Entrepreneurship 📈
Welcome back to the blog! In this post, we are going to be looking at how to add pagination to pages on a GatsbyJS website. By the end of this post:
- Your website will be able to create pages as required to house all your content.
- The number of pages will be determined by the number of posts we want per page.
- Finally, we will add controls to navigate between pages with the ability to skip to a certain page.
What Are We Creating?
Below is a screenshot from my live website conermurphy.com. Today, we will be covering the functionality that allows us to specify I want X posts per page and then have Gatsby create the pages for us. For the purposes of this tutorial, I will use a blog as an example, but this logic can apply to any page on a website. For example, I also use it with my notes on the website.
What we will finish with is the below URL structure:
- yourURL.com/blog/ <- Posts 19-24
- yourURL.com/blog/1 <- Posts 13-18
- yourURL.com/blog/2 <- Posts 7-12
- yourURL.com/blog/3 <- Posts 1-6
Check it out:
Prerequisites
So, what do you need to have done already before working through this tutorial?
As long as you have a working blog with some posts on it you will be good to go. For the purposes of this tutorial, I won't be covering how to set up sourcing content into Gatsby. Or, how to create the individual blog posts using a template file. But, if you are interested in these tutorials please let me know.
As long as you currently have a single page that has all your posts on it, you'll be good to go. 😃
If you are looking to set up your blog for the first time, LogRocket has a great tutorial here.
gatsby-node
Right, with all that out the way, let's get down to actually writing some code.
As mentioned above we should already have our posts sourced into Gatsby in the gatsby-node.js. Following this, they should display as one long list.
If your individual post page generation is already set up you should have a hook into the createPages API. If not that's okay, here's a quick overview.
createPages
createPages is an API of Gatsby Node that allows you to create pages dynamically. This API runs after the sourcing and transformation of nodes and the creation of the GraphQL schema is complete. Read more about it here.
In the following examples of code, I use ES6 Modules in my gatsby-node file, these aren't enabled by default. You can follow a tutorial I did on Twitter to set these up.
To start setting up the createPages API and the generation of the paginated pages, we need to add in the below code.
export async function createPages(params) {
  await Promise.all([turnBlogPostsIntoPages(params)]);
}
This allows us to hook into the createPages API. The Promise.all isn't necessary, you could add all the code into this one function. But, for readability, I separated out the individual generations into their own functions.
To illustrate this point, here is a direct copy from my current website:
export async function createPages(params) {
  // After the creation of the nodes create pages for each custom type.
  await Promise.all([
    // Blog Posts
    turnBlogPostsIntoPages(params),
    // Notes Pages
    turnNotesIntoPages(params),
    // Turn sourced Twitter Threads into pages.
    turnTwitterThreadsIntoPages(params),
    // Blog Tags Pages
    turnBlogPostTagsIntoPages(params),
    // Turn Notes Categories into pages
    turnNotesCategoriesIntoPages(params),
    // Turn Twitter Threads Tags Into Pages
    turnThreadsTagsIntoPages(params),
    // Turn Portfolio Tags into pages
    turnPortfolioTagsIntoPages(params),
    // Turn Read Categories into pages.
    turnReadsCategoriesIntoPages(params),
  ]);
}
If I put all these functions into the createPages function, the function would be over 300 lines long. This definitely isn't good for our readability.
Anyway, back on topic. Next, we need to do create the turnBlogPostsIntoPages function that we declared.
So, anywhere above this createPages function add in a new function like so:
async function turnBlogPostsIntoPages({ graphql, actions }) {
  const { createPage } = actions;
}

export async function createPages(params) {
  await Promise.all([turnBlogPostsIntoPages(params)]);
}
Now, we have a function that gets called when the createPages API runs. Let's dive deeper into this function and start making it do something useful.
Here is the finished code which we will break down in a second.
async function turnBlogPostsIntoPages({ graphql, actions }) {
  // 0: Destructuring out the action createPage which is used to create the pages.
  const { createPage } = actions;

  // 1: Query for all of blog post data. Most importantly the totalCount which we will use later on.
  const {
    data: {
      blog: { edges: blogPosts, totalCount: blogTotalCount },
    },
  } = await graphql(`
    query {
      blog: allMdx(filter: { fields: { contentCategory: { eq: "blog" } } }) {
        edges {
          node {
            fields {
              slug
              contentCategory
            }
            frontmatter {
              title
              date(formatString: "DD/MM/YYYY")
            }
          }
        }
        totalCount
      }
    }
  `);

  // 2: Create a page for every blog post node. (This is for indivual blog posts.)
  blogPosts.forEach(({ node }, index) => {
    createPage({
      path: node.fields.slug,
      component: path.resolve("./src/templates/Blog.js"),
      context: {
        slug: node.fields.slug,
        prev: index === 0 ? null : blogPosts[index - 1].node,
        next: index === blogPosts.length - 1 ? null : blogPosts[index + 1].node,
      },
    });
  });

  // 3: Create the main blog pages containing the posts..
  const blogTemplate = path.resolve("./src/pages/blog.js");

  const pageSize = 6; // Total number of posts on each page
  const pageCount = Math.ceil(blogTotalCount / pageSize); // Total number of pages required.

  // Loop through each page required (1 to x) and create a new blog page for each.
  Array.from({ length: pageCount }).forEach((_, i) => {
    createPage({
      path: `/blog/${i === 0 ? "" : i + 1}`,
      blogTemplate,
      // Context is passed to the page so we can skip the required amount of posts on each page.
      context: {
        skip: i * pageSize,
        currentPage: i + 1,
        pageSize,
      },
    });
  });
}
If you have completed the setup of a blog on GatsbyJS you may already have some code that resembles this. Let's break down each step and see what's going on.
- This is where we destructure out the createPage action. This is used to actually create the pages from the information we provide.
- We query for all the information related to the posts sourced in GraphQL. Most importantly the
totalCountnumber, as this is used to work out how many pages we need later on. - This is where the individual blog posts are created using the createPage action we destructured above.
- This is the step we are interested in for this tutorial. This is where we create the paginated blog posts. Let's break this down in more detail below.
Breaking Down the Pagination
Here's the code we are particularly interested in for this tutorial:
const blogTemplate = path.resolve("./src/pages/blog.js");

const pageSize = 6; // Total number of posts on each page
const pageCount = Math.ceil(blogTotalCount / pageSize); // Total number of pages required.

// Loop through each page required (1 to x) and create a new blog page for each.
Array.from({ length: pageCount }).forEach((_, i) => {
  createPage({
    path: `/blog/${i === 0 ? "" : i + 1}`,
    blogTemplate,
    // Context is passed to the page so we can skip the required amount of posts on each page.
    context: {
      skip: i * pageSize,
      currentPage: i + 1,
      pageSize,
    },
  });
});
Let's check out what's going on here.
const blogTemplate = path.resolve("./src/pages/blog.js");
First, we import the template file which we will be using to create all the paginated pages. Note that this is the actual blog page in your pages directory. Not the file used for creating individual posts located within the templates folder.
const pageSize = 6; // Total number of posts on each page
const pageCount = Math.ceil(blogTotalCount / pageSize); // Total number of pages required.
Following this, we create two more variables that will control the page size and how many pages we need. This is achieved by setting the pageSize variable to the number of posts we want on each page. Then we use this variable to work out how many pages we need.
We achieve this by taking the totalnumber from our graphQL query and dividing it by the page size. By rounding up this result it tells us how many pages we need.
Then we get to the juicy part:
// Loop through each page required (1 to x) and create a new blog page for each.
Array.from({ length: pageCount }).forEach((_, i) => {
  createPage({
    path: `/blog/${i === 0 ? "" : i + 1}`,
    blogTemplate,
    // Context is passed to the page so we can skip the required amount of posts on each page.
    context: {
      skip: i * pageSize,
      currentPage: i + 1,
      pageSize,
    },
  });
});
What's going on here?
The most important part of this is what happens on line 2. This is the part that enables us to create multiple blog pages.
Array.from({ length: pageCount }).forEach((_, i) => {});
We have a variable telling us how many pages we need (pageCount). But, for this to be of any use to us, we need to be able to loop through all the numbers leading to this point. This would allow us to create an individual page for each number.
This is where the above line comes in. We use Array.from({ length: pageCount }) to create an array with the length of the number of pages we need to create. Yes, the array items will be blank but that doesn't matter because we are only interested in the indexes.
To get access to the indexes we chain onto the Array.from() with a .forEach((_, i) => {}) like shown above. Because we are only interested in the indexes, we can skip the first argument to forEach. This would represent the actual item (blank) for the index we are currently on in the array. This then allows us access to the second argument which represents the index of the current item.
We are now able to loop through an array of variable length to allow us to create the required number of pages. Now we need to do the actual creation.
Which we can do with the following code:
createPage({
  path: `/blog/${i === 0 ? "" : i + 1}`,
  component: blogTemplate,
  // Context is passed to the page so we can skip the required amount of posts on each page.
  context: {
    skip: i * pageSize,
    currentPage: i + 1,
    pageSize,
  },
});
Let's break down what's going on here.
We are passing a series of arguments to the createPage action, these are:
- path: The URL the page will be created for.
- component: This is the file that will be used to template out the page.
- context: An object containing data passed to the page.
- skip: We pass this to tell the page how many posts to skip in the GraphQL query. We work this out by multiplying the current index of the item we are on by the page size. So page 1 would be:
0 * 6 = 0and for page 2 it would be:1 * 6 = 6. This ensures we skip the correct number of posts for each page. - currentPage: Tells the page what page it currently is which we will use for navigation later on.
- pageSize: The size of the page we defined.
- skip: We pass this to tell the page how many posts to skip in the GraphQL query. We work this out by multiplying the current index of the item we are on by the page size. So page 1 would be:
The currentPage context data will make more sense in the final section of this blog post. This is when we will look at creating pagination controls to move between the pages we have created. But, now let's look at the changes we need to make to the page file so it can consume the skip and pageSize context we passed.
Amending the Page File
Now, we have the gatsby-node.js file setup and ready to create all the pages for us. We now need to amend the page file that lists all the posts for us.
Updating the GraphQL Query
First, we need to update the GraphQL query that runs on the page. You should already have something that looks like this:
export const query = graphql`
  query {
    blog: allMdx(
      sort: {
        order: [DESC, DESC]
        fields: [frontmatter___date, frontmatter___id]
      }
      filter: { fields: { contentCategory: { eq: "blog" } } }
    ) {
      edges {
        node {
          fields {
            slug
          }
          frontmatter {
            date(formatString: "DD/MM/YYYY")
            tags
            title
            id
            image {
              childImageSharp {
                fluid(maxWidth: 400) {
                  ...GatsbyImageSharpFluid
                }
              }
            }
          }
        }
      }
      totalCount
    }
  }
`;
The important part to note in this query is that we are fetching all the blog posts. At this point, there are no constraints on the query other than a filter I've done to select all the blog content.
Now, let's look at what we need to add in.
Remember when we edited the gatsby-node.js file we passed a few pieces of context down to the page? Most notably skip and pageSize. Well because we passed them as context to the page we have them available to us to use in GraphQL as variables.
Let's take a look at the amended query and then we'll break them down:
export const query = graphql`
  query($skip: Int = 0, $pageSize: Int = 6) {
    blog: allMdx(
      limit: $pageSize
      skip: $skip
      sort: {
        order: [DESC, DESC]
        fields: [frontmatter___date, frontmatter___id]
      }
      filter: { fields: { contentCategory: { eq: "blog" } } }
    ) {
      edges {
        node {
          fields {
            slug
          }
          frontmatter {
            date(formatString: "DD/MM/YYYY")
            tags
            title
            id
            image {
              childImageSharp {
                fluid(maxWidth: 400) {
                  ...GatsbyImageSharpFluid
                }
              }
            }
          }
        }
      }
      totalCount
    }
  }
`;
As you can see in the top line of the query we added the two variables we passed as context. Let's look at this line in more depth:
query($skip: Int = 0, $pageSize: Int = 6 ) {
If you're unfamiliar with GraphQL syntax. Below is a quick overview of what is happening.
- $skip: This is the name of the variable
- Int: This is the type of data the variable is
- = 0: This is the default value of the variable.
So, in this line, we are taking in two variables which are both Integers (Ints) and giving them a default value.
Now, let's take a look at where they're used in the query:
query($skip: Int = 0, $pageSize: Int = 6 ) {
    blog: allMdx(
      limit: $pageSize
      skip: $skip
      sort: { order: [DESC, DESC], fields: [frontmatter___date, frontmatter___id] }
      filter: { fields: { contentCategory: { eq: "blog" } } }
    )
    // Rest of the query goes here...
}
As you can see we have added the skip and pageSize variables. They are passed to the skip and limit properties of the query.
If we were to translate this to the actual values of page 1, it would look like this:
query($skip: Int = 0, $pageSize: Int = 6 ) {
    blog: allMdx(
      limit: 6
      skip: 0
      sort: { order: [DESC, DESC], fields: [frontmatter___date, frontmatter___id] }
      filter: { fields: { contentCategory: { eq: "blog" } } }
    )
    // Rest of the query goes here...
}
This is because we want to limit the results to 6 values and we are skipping 0 because we are on the first page. If we were to look at page 2 as an example, we can start to see how it works.
query($skip: Int = 0, $pageSize: Int = 6 ) {
    blog: allMdx(
      limit: 6
      skip: 6
      sort: { order: [DESC, DESC], fields: [frontmatter___date, frontmatter___id] }
      filter: { fields: { contentCategory: { eq: "blog" } } }
    )
    // Rest of the query goes here...
}
The only thing that has changed is the skip value. Now, instead of skipping 0 values, we skip the first 6. Then we return a max of 6 values starting from item 7 in the dataset.
This is repeated for every page we generate until we have covered all the posts.
NOTE: If you want your first page to show the latest post you need to use the sort property in the query. See my example above for how to sort using the frontmatter\__date field._
Pagination Controls
It's great having our posts paginated out over several pages. But, if the only way we have to move between them is by changing the URL we're going to have issues.
This is where adding pagination controls will help us. We're going to add a couple of dedicated buttons that allow next and previous movement on pages. We will also add a list of pages in the middle of the buttons so you can skip pages if you wish.
Creating the Pagination Component
Before we can implement this into our page we first need to create our Pagination component. Let's take a look at the code now.
export default function Pagination({ pageSize, totalCount, currentPage }) {
const totalPages = Math.ceil(totalCount / pageSize);
const prevPage = currentPage - 1;
const nextPage = currentPage + 1;
const hasNextPage = nextPage <= totalPages;
const hasPrevPage = prevPage >= 1;
const prevLink = prevPage === 1 ? "blog" : `blog/${prevPage}`;
const nextLink = `blog/${nextPage}`;
return (
<div>
<Link title="prev page" disabled={!hasPrevPage} to={prevLink}>
← <span className="word">Previous</span>{" "}
</Link>
{Array.from({ length: totalPages }).map((_, i) => (
<Link
key={`blog-page-${i}`}
className={currentPage === 1 && i === 0 ? "current" : ""}
to={`blog/${i === 0 ? "" : i + 1}`}
>
{i + 1}
</Link>
))}
<Link title="next page" disabled={!hasNextPage} to={nextLink}>
<span className="word">Next</span> →
</Link>
</div>
);
}
The code isn't too complex, we have a couple of Link elements from Gatsby. Then another one of our Array.from() specials from earlier. This time though instead of using a .forEach() we use a .map() because we want to return the elements.
Let's break this down.
Creating the Links
The first section we are going to take a look at is the code that generates the links for us based on the props we pass in. Here's the code:
export default function Pagination({
  pageSize,
  totalCount,
  currentPage
}) {
  const totalPages = Math.ceil(totalCount / pageSize);
  const prevPage = currentPage - 1;
  const nextPage = currentPage + 1;
  const hasNextPage = nextPage <= totalPages;
  const hasPrevPage = prevPage >= 1;

  const prevLink = prevPage === 1 ? "blog" : `blog/${prevPage}`;
  const nextLink = `blog/${nextPage}`;

  // ... Rest of the component here
So, what are we doing here?
First, we pass in a series of props:
- pageSize: The number of posts we want on each page.
- totalCount: The total amount of blog posts there are from the GraphQL query on the blog page
- currentPage: This comes from the context we added in
gatsby-node.js. It is destructured out on the page and then passed down to the component.
After this, we create a series of variables that are used to determine if there is another page to navigate to. And, if so what the URL is.
- totalPages: Int: The total amount of pages required
- prevPage: Int: Works out the index of the previous page based on the current one.
- nextPage: Int: Works out the index of the next page based on the current one.
- hasNextPage: Bool: Checks if
nextPageis smaller than or equal tototalPages. - hasPrevPage: Bool: Checks if the
prevPagevariable is greater than or equal to one.
These 5 variables are used throughout the component to decide whether elements should be displayed or not. But, we will come to that in a second. First, we need to create the next and previous links which are our final two variables.
- prevLink: Str: Checks if the
prevPagevariable is equal to one. If so set the variable to'blog'which will redirect you to the main blog page. If not, set the variable toblog/${prevPage}. - nextLink: Str: This is set to
blog/${nextPage}. This is done because we have a separate variable controlling whether there is another page or not.
Now we've covered all the variables required to create the elements, let's look at making the buttons.
Next and Previous Buttons
The code for the previous and next buttons is actually similar with a few word changes. For this reason, I'm only going to break one of them down so we can understand how they both work. First let's look at the complete code so you can see the differences:
<Link title="prev page" disabled={!hasPrevPage} to={prevLink}>
← <span className="word">Previous</span>{' '}
</Link>
<Link title="next page" disabled={!hasNextPage} to={nextLink}>
<span className="word">Next</span> →
</Link>
The structure of the links is a Gatsby Link element wrapping a span describing what the button does. Let's check out what we do with them:
- title: Str: We set a title attribute on the element to declare to the user what each link does.
- disabled: Bool: This is where the two variables
hasPrevPageandhasNextPagecome in. If the variable says that the next or previous page is outside the available pages it will disable the link. This is then styled by CSS to lower the opacity and prevent the user from clicking on them. Check below for this code. - to: Str: This is the destination we want the element to navigate to if clicked.
This covers the functionality, the last part is adding the text elements to label them up on the screen. For this, we use a span wrapping the relevant word and a next/previous arrow depending on the button.
CSS Code to disable the link:
&[disabled] {
      pointer-events: none;
      text-decoration: line-through;
      color: var(--black);
      opacity: 0.5;
    }
Adding All the Pages
We're almost there with the pagination component. We just need to add in the links for each page between the previous and next buttons.
Here's the code for adding in the page links:
{
  Array.from({ length: totalPages }).map((_, i) => (
    <Link
      key={`blog-page-${i}`}
      className={currentPage === 1 && i === 0 ? "current" : ""}
      to={`blog/${i === 0 ? "" : i + 1}`}
    >
      {i + 1}
    </Link>
  ));
}
It's based on a similar principle to what we used in the past for generating each page in gatsby-node.js. However, instead of using a .forEach() to loop over each index, we use a .map() so we can return the Link element.
Let's break down what's happening in this code block:
- We create an array with the length equal to
totalPagesand then map over each index. - We create a
Linkelement and pass 3 props to it: - key: Str: Standard key prop required by React when returning elements from a map.
- className: Str: Used to add the 'current' class to the element if we are on that page to allow for styling.
- to: Str: The destination we want the link to navigate to.
- Finally, we add the text inside the
Linkwhich is the index plus 1 to negate the 0-indexing of JavaScript arrays.
Here is the CSS for the current element styling we added:
&[aria-current],
&.current {
  color: var(--green);
  font-weight: 600;
  border-bottom: 2px solid var(--green);
}
Adding to the Page File
We have now created the pagination component, it's time to add it to our blog page file like so:
return (
  <>
    <Pagination
      pageSize={6}
      totalCount={totalCount}
      currentPage={currentPage || 1}
    />
    <AllPostsContainer>
      {blogPosts.map((post) => (
        <BlogPostCard
          key={`blogPostCard-${post.node.frontmatter.id}`}
          post={post}
        />
      ))}
    </AllPostsContainer>
    <Pagination
      pageSize={6}
      totalCount={totalCount}
      currentPage={currentPage || 1}
    />
  </>
);
As we have split the entire pagination component, it's now a matter of passing in the required props:
- pageSize: Int: The total number of posts on each page
- totalCount: Int: The total number of posts from the GraphQL query.
- currentPage: Int: The index of the current page taken from context, if not 1.
We should now be set up and ready to rock and roll.
Summing Up
If everything went to plan you should have something that resembles this for functionality:
I didn't include the CSS in this article apart from one or two sections to try and keep the length of the post down. But, if you're interested in all the CSS it is available on the Github for my website.
One thing I didn't include in this post but do recommend is storing your pageSize variable in a .env file. Then you can import it into Gatsby using parseInt(process.env.GATSBY_PAGE_SIZE)}. This means that should you ever want to change the number of posts per page you only need to change it in one place.
I hope you found this post helpful if you did I would greatly appreciate you sharing it with others on Social Media so they can benefit from it too. If you have any feedback I would love to hear it, you can reach me over on Twitter.
Thanks for reading. 😃
--
This post was originally published on my blog conermurphy.com. If you're interested in reading my posts as soon as they're published please consider following me on Twitter.


